-

- Wi-Fi installation guide
FAQ
Wi-Fi installation guide
Wifi connection guide for Smartphone & Tablet devices
Please select below
INVmate II for Android (dehumidifiers)
Wi-Fi installation
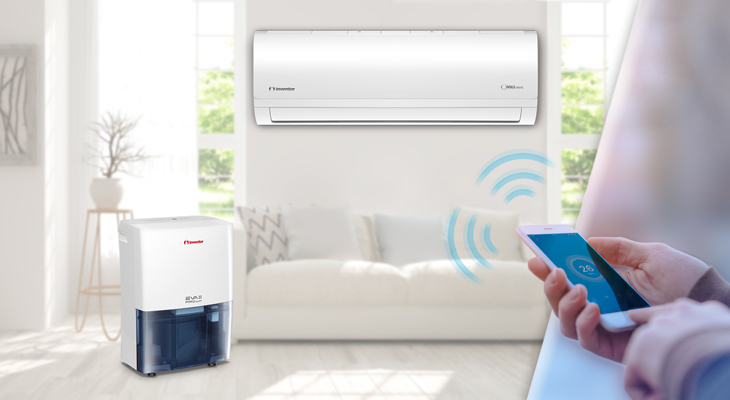
Thanks to the remote access feature, which is available on the EVA II PRO Wi-Fi & Power Wi-Fi models, complete access of your device whenever you desire is easily accomplished, from virtually anywhere! Follow the steps below, in order to connect the dehumidifier to your home's Wi-Fi network:
Step 1

Search the Play Store by typing INVMATE II.
Step 2

Install the app on your Smartphone/Tablet and open.
Step 3

Select Create Account located at the bottom right. Create an account. A confirmation email with an activation link will be sent.
Step 4

Enter your e-mail address and password. A pop-up window will inform you that you will need to activate your account by clicking on the link sent to your registration e-mail address.
Then open the e-mail you received at your registration e-mail address and click on the included link to activate your account. Return to the first screen of the app by pressing the < symbol in the upper left corner.
Step 5

Enter your email address and password and choose Sign In.
Step 6

Press Add device as shown above.
Step 7

Choose Dehumidifier from the indicated menu to connect your appliance.
Step 8

Power on your dehumidifier, wait 5 seconds then click on next.
Important Note: All the steps that will follow should be performed while the AP indication is displayed on the digital control panel of the dehumidifier, if there is no AP indication, please restart the above procedure.
Step 9

Press and hold the FILTER button of the dehumidifier for 3 seconds, once the AP indication is displayed on the control panel click on Next.
Note: If no Filter button is present, press the ION button instead.
Step 10

Connect to your dehumidifier's wireless network as shown above. Go to the wireless network settings of your Smartphone/Tablet, check for the correct indicated network name and fill in the password.
Step 11

Be certain that the connection to the wireless network has been successful.
Step 12

Return to the APP. The name of your router will be automatically displayed. Please enter your network password on the field below. Click on Start Configuration
Step 13

Once the pairing process is completed, the connection is activated.
Step 14

Choose the dehumidifier you recently added.
Step 15

The dehumidifier is now successfully connected to your wireless network!
INVmate II for iOS (dehumidifiers)
Wi-Fi installation
Thanks to the remote access feature, which is available on the EVA II PRO Wi-Fi & Power Wi-Fi models, complete access of your device whenever you desire is easily accomplished, from virtually anywhere! Follow the steps below, in order to connect the dehumidifier to your home's Wi-Fi network:
Step 1

Search and install the INVMATE II app on your Smartphone/Tablet.
Step 2

In case you are using an iPad, choose the iPhone Only option as indicated.
Step 3

Select Create Account located at the bottom right. Create an account. A confirmation email with an activation link will be sent. Follow the link provided.
Step 4

Once you activate the account, return to the app and choose Add device.
Step 5

Choose Dehumidifier from the indicated menu to connect your appliance.
Step 6

Power on your dehumidifier, wait 5 seconds then follow next step.
Important Note: All the following steps should be performed while the AP indication is being displayed on the digital control panel of the dehumidifier, if there is no AP indication, please power off and restart the above steps.
Step 7

Press and hold the FILTER button of the dehumidifier for 3 seconds, once AP is displayed on the control panel follow next step.
Note: If no Filter button is present, press the ION button instead.
Step 8

Connect to your dehumidifier's wireless network as shown above. Go to the wireless network settings of your Smartphone/Tablet, check for the correct indicated network name and fill in the password.
Step 9

Please follow the above indicated procedure. Click on the Settings icon on your Smartphone/Tablet. On the new interface click on the symbol < SETTINGS located on the top right. Scroll up until you find the Wi-Fi icon and click on it. From the list choose: connect to net_a1_xxxx wireless network and then return to the app.
Step 10

Be certain that the connection to the wireless network has been successful.
Step 11

Return to the APP. The name of your router will be automatically displayed. Please enter your network password on the field below. Click on Start Configuration
Step 12

Once the pairing process is completed, the connection is activated.
Step 13

Your connection has been completed.
Step 14

Choose the dehumidifier you have added.
Step 15

The dehumidifier is now successfully connected to your wireless network!
Passion Pro Wi-Fi Installation
Step 1

Open the louver
Step 2

Move the middle pillar
Step 3

Remove the louver
Step 4

Remove the screw placed under the right cap
Step 5

Remove the screw placed under the left cap
Step 6

Open the top
Step 7

Behind the top you will find the Wi-Fi socket
Step 8

Install the Wi-Fi module as indicated in the picture
Life Pro Wi-Fi Installation
Step 1

Open the front panel of the air conditioner
Step 2

Unscrew the cover of the electrical box cover
Step 3

Find the cable with the blue plug
Step 4

Prepare the plug by removing the fuse
Step 5

Connect the Wi-Fi Module cable to the plug
Step 6

Insert the Wi-Fi module as shown in the figure and screw the screw
Step 7

Pass the cable as recommended in the picture to secure its position
Step 8

The installation has been successfully completed
INVmate II for Android (Aria, Nemesis, Passion Pro, Passion Pro II, Passion ECO, Omnia, Omnia ECO air conditioners)
How does the Wi-Fi module installation procedure work?
Enable the "AP" mode on the air conditioning unit. By activating the AP mode, the unit acts as an Access Point. Create an INVmate account on which you can bind the air conditioning unit(s), so you can manage the unit remotely. Join the air conditioning unit to your home network to have access to the internet.
Enable "AP" mode on the air conditioning unit

Disconnect the AC unit from the power grid for 10 seconds. Reconnect the unit to the power grid and press the LED button repeatedly 7 times, until the "AP" notification appears on the unit's frontal panel. Note: For the next 3 minutes, the air conditioning unit doesn't accept the commands from the remote controller.
Step 1

Install the INVmate II application on your mobile/tablet. In order to find the application on Play Store, please use the following text: INVmateii or click here
Step 2

Select "Create Account" in order to create a user account
Step 3

Fill in your email address and a password (the password must meet the following criteria: 6-16 alphanumeric characters, lower or uppercase, no spaces) and then tap the "Registration" button.
Step 4

You will get the message above, press "OK"
Step 5

You will get a confirmation email at your email address. Follow the link located inside the confirmation email.
Step 6

After the registration of your user account, go back to the INVmate II application. Select "+ Add Device"
Step 7

Scan the QR code located on the white sticker
Step 8

Choose your Wi-Fi network listed, fill in the Wi-Fi network key and then press "ΟΚ"
Step 9

Please wait until the installation procedure is over (At this point, the mobile/tablet device connects to your Wi-Fi network, then to the air conditioning unit and finally to your Wi-Fi network)
Step 10

The air conditioning unit connected to your Wi-Fi network successfully. Press "ΟΚ"
Step 11

Select the air conditioning unit (e.g. AC6820)
Step 12

Select the 1st option and press "ΟΚ"
Problems?
INVmate II for iOS (Aria, Nemesis, Passion Pro, Passion Pro II, Passion ECO, Omnia, Omnia ECO air conditioners)
How does the Wi-Fi module installation procedure work?
Enable the "AP" mode on the air conditioning unit. By activating the AP mode, the unit acts as an Access Point. Create an INVmate account on which you can bind the air conditioning unit(s), so you can manage the unit remotely. Join the air conditioning unit to your home network to have access to the internet.
Enable the "AP" mode on the air conditioning unit
Disconnect the AC unit from the power grid for 10 seconds. Reconnect the unit to the power grid and press the LED button repeatedly 7 times, until the "AP" notification appears on the unit’s frontal panel. Note: For the next 3 minutes, the air conditioning unit doesn't accept the commands from the remote controller.

Step 1b

Select "iPhone Only" as in the image
Step 2

Select "Create Account" in order to create a user account
Step 3

Fill in your email address and a password (the password must meet the following criteria: 6-16 alphanumeric characters, lower or uppercase, no spaces) and then tap the "Registration" button
Step 4

You will get the message above, press "ΟΚ"
Step 5

You will get a confirmation email on your email address. Follow the link located inside the confirmation email.
Step 6

After the registration of your user account, go back to the INVmate II application. Select "+ Add Device".
Step 7

In case of the message above, press "OK" in order to give access to the INVmate II to use the mobile/tablet's camera.
Step 8

Scan the QR code located on the white sticker
Step 9

Please follow the steps above
Step 10

Go to the Wi-Fi settings of your mobile/tablet device, search for the Wi-Fi network with following name: netac#### and then connect to it.
Step 11

Fill in the following password: 12345678 and then select "ΟΚ"
Step 12

Ensure that you have successfully connected to this Wi-Fi network as in the above image
Step 13

Go back to the INVmate II application, choose your Wi-Fi network and fill in the Wi-Fi network key on the "Password" field. Select "ΟΚ"
Step 14

Select "ΟΚ" and go back to your mobile/tablet's Wi-Fi settings
Step 15

Connect to your Wi-Fi network. Go back to the INVmate II application.
Step 16

The air conditioning unit has successfully connected to your Wi-Fi network. Select "ΟΚ".
Step 17

Choose the air conditioning unit (e.g. AC6820)
Step 18

Select the 1st option and press "ΟΚ". The Wi-Fi installation procedure is successful.
Problems?
INVmate for Android (Vision and Passion air conditioners)
LOCAL MODE (When you are at home)
(Note: Complete the following steps within 7 minutes)
Step 1

Go to Wi-Fi settings on your mobile/tablet and select NetHome… from the listed wireless networks
Step 2

Enter the default password 12345678
Step 3

Open up the Invmate application and press "Network"
Step 4

Select your home Wi-Fi network

Step 6

Be sure that your mobile/tablet is connected to your home Wi-Fi network. Then press "Local"

Remote Control Mode (Long distance control when you are outside)
(Please ensure that you have followed all the previous steps)
Open up the Invmate application and follow the steps below:
Create an account
Step 1

Press User
Step 2

Press Registration
Step 3

Press Agree
Step 4

Fill in all the required information and press OK to complete the registration process
Username: Must be 2-20 characters long, case sensitive with no spaces
Password: Must be 6-16 characters long, case sensitive with no spaces
Bind the AC device
Step 5

Enter your Username and Password and press Remote (You may save this information by clicking the "Remember me" checkbox)
Step 6

Press Bind

Step 8

Scan the QR packed with the Smart Kit (Please place the stick onto the AC device to avoid loss). Problems?
Press OK to complete the procedure
ΝΟΤΕ:
In case you are installing multiple air-conditioning units, follow the same procedure for the rest of the units using the same account (skipping steps 1-4).
INVmate for iOS (Vision and Passion air conditioners)
LOCAL MODE (When you are at home)
(Note: Complete the following steps within 7 minutes)
Step 1

Go to the wireless settings on your mobile/tablet
Step 2

Select NetHome… from the listed wireless networks and enter the default password: 12345678
Step 3

Open up the Invmate application and press "Network"
Step 4

Select your home Wi-Fi network
Step 5

Enter your home Wi-Fi network password

Step 7

Be sure that your mobile/tablet is connected to your home Wi-Fi network. Then press "Local"

Remote Control Mode (Long distance control when you are outside)
(Please ensure that you have followed all the previous steps)
Open up the Invmate application and follow the steps below:
Create an account
Step 1

Press User
Step 2

Press Registration
Step 3

Press Agree
Step 4

Fill in all the required information and press OK to complete the registration process
Username: Must be 2-20 characters long, case sensitive with no spaces
Password: Must be 6-16 characters long, case sensitive with no spaces
Bind the AC device
Step 5

Enter your Username and Password and press Remote (You may save this information by clicking the "Remember me" checkbox)
Step 6

Press Bind

Step 8
Scan the QR packed with the Smart Kit (Please place the stick onto the AC device to avoid loss). Problems?
Press OK to complete the procedure
ΝΟΤΕ:
In case you are installing multiple air-conditioning units, follow the same procedure for the rest of the units using the same account (skipping steps 1-4).
EWPE Smart for Android (Life Pro Wi-Fi air conditioners)
How to activate the Wi-Fi operation of your air conditioner
Via EWPE Smart application, create an account and connect your Smartphone with the air conditioner unit, in order to take control of your device from wherever and whenever you want. Join the air conditioning unit to your home network to have access to the internet.
Step 1

Download for free the EWPE Smart application through Google Play.
Step 2

When the installation is completed, open the app to begin with the connection of your Smartphone with your air conditioner.
Step 3

Select the icon on the upper left side of your mobile screen.
Step 4

Select again the same icon at the upper side of your mobile screen.
Step 5

At that stage fulfill your email address and a password (the password must meet the following criteria: 6-16 alphanumeric characters, lower or uppercase, no spaces) and then press the "Sign Up" button.
Step 6

Press the "+" icon at the upper right side of the mobile screen.
Step 7

Select the type of the device you have purchased to connect with.
Step 8

Press "Remote Controller with Wi-Fi button".
Step 9

Follow the below steps that are mentioned on the above screen and afterwards select the button "Next":
1. Take the remote controller and fix at the appliance
2. Under remote controller off status, press Mode + Turbo combination buttons for 10s. once the appliance beeps for 2 seconds, this indicates that the appliance Wi-Fi reset was successful.
3. Prompt: configure within 2 min after reset; reset again if configuration isn't done within 2 min.
Step 10

The application shows up all the available network connections, to select the one, you want to connect your device with. Fill all the necessary fields and press the "Search Device" to connect with your air conditioner.
*the 5GHz network is not supported
Step 11

Your air conditioner has been successfully connected.
EWPE Smart for iOS (Life Pro Wi-Fi air conditioners)
How to activate the Wi-Fi operation of your air conditioner
Via EWPE Smart application, create an account and connect your Smartphone with the air conditioner unit, in order to take control of your device from wherever and whenever you want. Join the air conditioning unit to your home network to have access to the internet.
Step 1

Download for free the EWPE Smart application through App Store.
Step 2

When the installation is completed, open the app to begin with the connection of your Smartphone with your air conditioner.
Step 3

Select the icon on the upper left side of your mobile screen.
Step 4

Select again the same icon at the upper side of your mobile screen.
Step 5

At that stage fulfill your email address and a password (the password must meet the following criteria: 6-16 alphanumeric characters, lower or uppercase, no spaces) and then press the "Sign Up" button.
Step 6

Press the "+" icon at the upper right side of the mobile screen.
Step 7

Select the type of the device you have purchased to connect with.
Step 8

Press "Remote Controller with Wi-Fi button".
Step 9

Follow the below steps that are mentioned on the above screen and afterwards select the button "Next":
1. Take the remote controller and fix at the appliance
2. Under remote controller off status, press Mode + Turbo combination buttons for 10s. once the appliance beeps for 2 seconds, this indicates that the appliance Wi-Fi reset was successful.
3. Prompt: configure within 2 min after reset; reset again if configuration isn't done within 2 min.
Step 10

The application shows up all the available network connections, to select the one, you want to connect your device with. Fill all the necessary fields and press the "Search Device" to connect with your air conditioner.
*the 5GHz network is not supported
Step 11

Your air conditioner has been successfully connected.
EWPE Smart for Android (Nemesis Pro air conditioners)
How to activate the Wi-Fi operation of your air conditioner
Via EWPE Smart application, create an account and connect your Smartphone with the air conditioner unit, in order to take control of your device from wherever and whenever you want. Join the air conditioning unit to your home network to have access to the internet.
Step 1
Download for free the EWPE Smart application through Google Play.
Step 2
When the installation is completed, open the app to begin with the connection of your Smartphone with your air conditioner.
Step 3
Select the icon on the upper left side of your mobile screen.
Step 4
Select again the same icon at the upper side of your mobile screen.
Step 5
At that stage fulfill your email address and a password (the password must meet the following criteria: 6-16 alphanumeric characters, lower or uppercase, no spaces) and then press the "Sign Up" button.
Step 6
Press the "+" icon at the upper right side of the mobile screen.
Step 7
Select the type of the device you have purchased to connect with.
Step 8
Press "Remote Controller without Wi-Fi button".
Step 9
Follow the below steps that are mentioned on the above screen and afterwards select the button "Next":
1. Take the remote controller and fix at the appliance
2. Under remote controller off status, press Mode + Turbo combination buttons for 10s. once the appliance beeps for 2 seconds, this indicates that the appliance Wi-Fi reset was successful.
3. Prompt: configure within 2 min after reset; reset again if configuration isn't done within 2 min.
Step 10
The application shows up all the available network connections, to select the one, you want to connect your device with. Fill all the necessary fields and press the "Search Device" to connect with your air conditioner.
*the 5GHz network is not supported
Step 11
Your air conditioner has been successfully connected.
EWPE Smart for iOS (Nemesis Pro air conditioners)
How to activate the Wi-Fi operation of your air conditioner
Via EWPE Smart application, create an account and connect your Smartphone with the air conditioner unit, in order to take control of your device from wherever and whenever you want. Join the air conditioning unit to your home network to have access to the internet.
Step 1
Download for free the EWPE Smart application through App Store.
Step 2
When the installation is completed, open the app to begin with the connection of your Smartphone with your air conditioner.
Step 3
Select the icon on the upper left side of your mobile screen.
Step 4
Select again the same icon at the upper side of your mobile screen.
Step 5
At that stage fulfill your email address and a password (the password must meet the following criteria: 6-16 alphanumeric characters, lower or uppercase, no spaces) and then press the "Sign Up" button.
Step 6
Press the "+" icon at the upper right side of the mobile screen.
Step 7
Select the type of the device you have purchased to connect with.
Step 8
Press "Remote Controller without Wi-Fi button".
Step 9
Follow the below steps that are mentioned on the above screen and afterwards select the button "Next":
1. Take the remote controller and fix at the appliance
2. Under remote controller off status, press Mode + Turbo combination buttons for 10s. once the appliance beeps for 2 seconds, this indicates that the appliance Wi-Fi reset was successful.
3. Prompt: configure within 2 min after reset; reset again if configuration isn't done within 2 min.
Step 10
The application shows up all the available network connections, to select the one, you want to connect your device with. Fill all the necessary fields and press the "Search Device" to connect with your air conditioner.
*the 5GHz network is not supported
Step 11
Your air conditioner has been successfully connected.